

A pretty Valentine’s dessert doesn’t have to involve hours of baking, complicated frosting, or expensive ingredients. Sometimes all it takes is fresh strawberries, melted chocolate, or a little raspberry jam tucked inside golden pastry.
The challenge is finding something that looks special without spending the whole evening in the kitchen. You want a dessert that feels thoughtful, tastes homemade, and still leaves you time to enjoy Valentine’s Day.
These valentine’s day desserts are made for exactly that kind of celebration. You’ll find chocolate-covered strawberries with delicate drizzles, creamy cheesecake jars, flaky pastry hearts, rich chocolate mousse, and soft red velvet cookie sandwiches.
Some recipes don’t require an oven at all. Others use shortcuts like store-bought puff pastry or simple decorating methods that look more difficult than they are.
You can make one dessert for a quiet dinner at home or prepare several treats for a Valentine’s party. Either way, these 17 ideas will help you put something sweet and beautiful on the table without making the day stressful.
1. Dip Fresh Strawberries in Chocolate with a White Chocolate Drizzle

Chocolate-covered strawberries look elegant, but they’re one of the simplest desserts to prepare at home.
Wash and thoroughly dry 1 pound fresh strawberries, leaving the green tops attached.
Melt 8 ounces semisweet chocolate in a microwave-safe bowl using short 20-second intervals, stirring between each until smooth.
Hold each strawberry by its leaves, dip it into the chocolate, and place it on a parchment-lined tray.
For the finishing touch:
- Melt 3 ounces white chocolate separately.
- Drizzle thin lines over the coated strawberries.
- Refrigerate briefly until the chocolate sets.
Serve the same day for the best texture. Any remaining moisture on the berries can make the chocolate coating slide off.
Three Details for Beautiful Chocolate-Covered Strawberries
CHOCOLATE STRAWBERRY GUIDE
The Secret to a Neat Chocolate Finish
A few small details help the coating look smooth and the drizzle stay delicate.
🍓
Completely Dry Berries
Pat strawberries dry, including around the leaves. Even a little surface water can interfere with the chocolate coating.
🍫
Smooth Melted Chocolate
Heat gently and stop once the chocolate is smooth. Overheating can make it thick, grainy, or difficult to dip.
🤍
Thin White Drizzles
Let the dark coating firm up first, then move a small piping bag back and forth for fine white chocolate lines.
For a cleaner presentation: Let extra chocolate drip back into the bowl before setting each berry on parchment. This prevents thick chocolate puddles around the bottoms.
2. Layer No-Bake Strawberry Cheesecake in Little Glass Jars
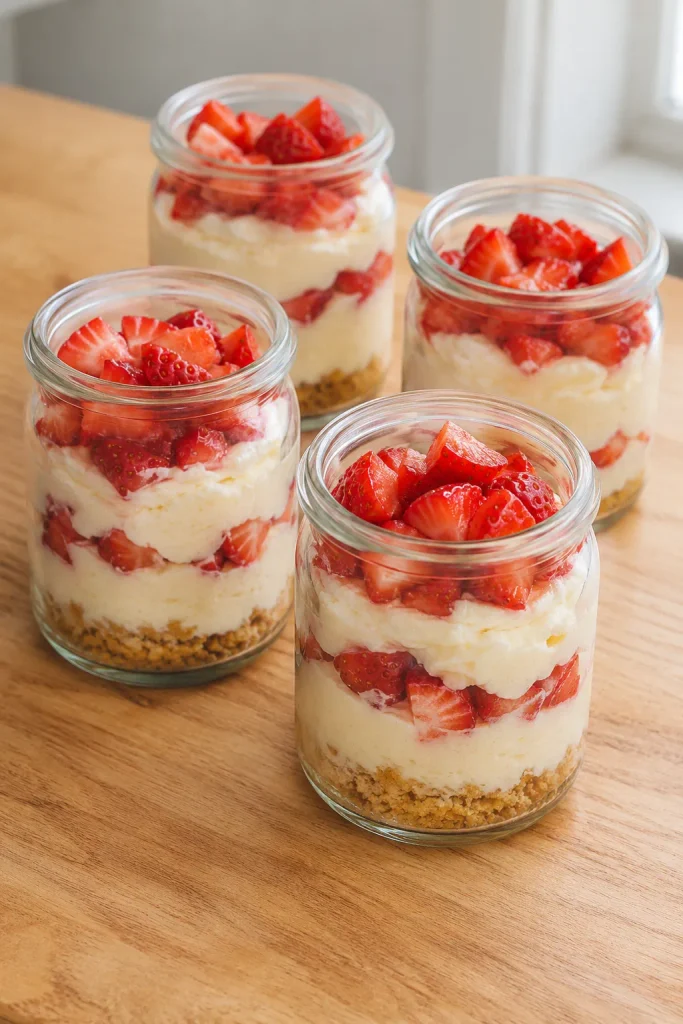
Individual cheesecake jars make dessert feel special without needing a springform pan or water bath.
Mix 1 cup graham cracker crumbs with 3 tablespoons melted butter. Divide the mixture among six small dessert jars.
Beat 8 ounces softened cream cheese, ⅓ cup powdered sugar, and 1 teaspoon vanilla until smooth.
Whip ¾ cup cold heavy cream to stiff peaks, then gently fold it into the cream cheese mixture.
Layer each jar with:
- Graham cracker crumbs
- Creamy cheesecake filling
- 1½ cups chopped fresh strawberries, divided evenly
Refrigerate for at least 2 hours before serving.
Keep the jars covered and chilled until dessert time.
No-Bake Strawberry Cheesecake Layering Checklist
NO-BAKE CHEESECAKE JAR CHECKLIST
Make Every Cheesecake Layer Look Neat
Use clear, small jars. Transparent sides show off the crumb, cream, and strawberry layers without extra decoration.
Press the crumbs gently. A light press makes a stable base. Packing too firmly can make the crumbs difficult to scoop.
Pipe the filling. Spoon the cheesecake mixture into a piping bag or clean zip-top bag to avoid smearing the jar sides.
Save some berries for the top. Add the final strawberry pieces just before serving so they look fresh and do not release too much juice.
Make-ahead note: You can prepare the crumb and cheesecake layers the day before. Store the jars covered in the refrigerator, then finish with fresh strawberries closer to serving.
3. Bake Raspberry Jam Puff Pastry Hearts Until Golden
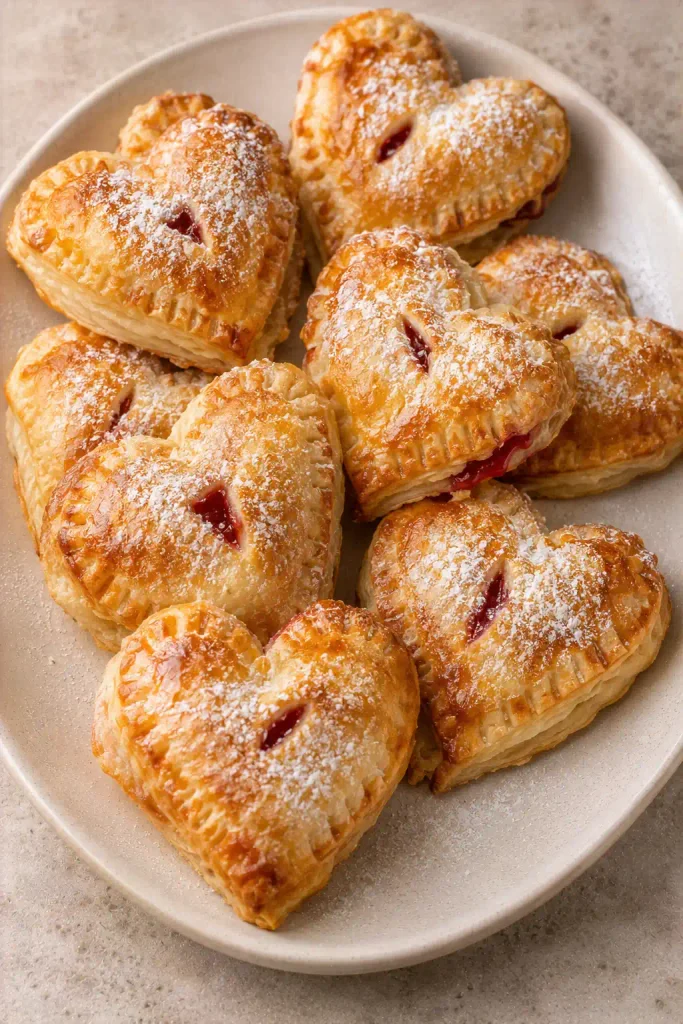
These little pastry hearts look like something from a bakery, but refrigerated or thawed store-bought puff pastry does most of the work.
Heat the oven to 400°F (205°C).
Roll out 2 thawed puff pastry sheets and cut an even number of hearts using a small heart-shaped cookie cutter.
Place half the hearts on a parchment-lined baking sheet. Add 1 teaspoon thick raspberry jam to each center.
Finish the pastries by:
- Placing a second pastry heart over each filling.
- Pressing the edges closed with a fork.
- Cutting a small steam vent and brushing lightly with beaten egg.
Bake for 15 to 20 minutes, until puffed and golden.
Cool slightly, then dust with powdered sugar.
Before and After Baking Raspberry Pastry Hearts
RASPBERRY PUFF PASTRY GUIDE
From Flat Pastry Hearts to Golden Little Treats
💗
BEFORE: Fill and Seal
Cold pastry: Work with chilled dough so the hearts hold their shape.
Small jam center: Keep the filling away from the edges to leave room for sealing.
Sealed edges: Press firmly with a fork and cut a small vent in the top.
🥐
AFTER: Golden and Flaky
Puffed layers: The pastry should rise with visible flaky edges.
Jam inside: Most of the raspberry filling stays tucked between the pastry hearts.
Light finish: A little powdered sugar adds contrast without hiding the golden crust.
If the dough gets soft: Refrigerate the assembled pastries for 10 minutes before baking. Cold pastry is easier to handle and helps the hearts keep their edges.
4. Whip Three-Ingredient Chocolate Mousse into Elegant Cups
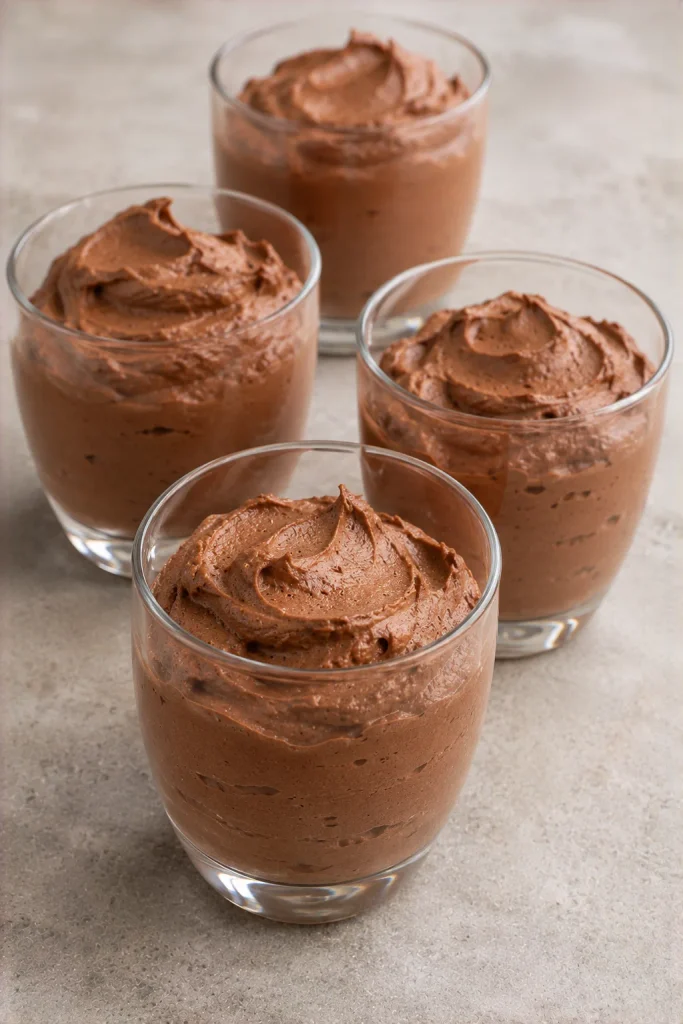
A rich chocolate dessert doesn’t have to be heavy. This three-ingredient mousse has a smooth, airy texture and looks lovely in small glasses.
Chop 4 ounces semisweet chocolate and place it in a heatproof bowl.
Heat ¼ cup heavy whipping cream until hot but not boiling. Pour over the chocolate, rest for a minute, and stir until smooth. Let cool until lukewarm.
Whip ¾ cup cold heavy cream with 1 tablespoon powdered sugar until medium peaks form.
Gently fold the whipped cream into the cooled chocolate mixture in two additions.
Spoon into four small dessert cups and refrigerate for at least 2 hours, until set.
Serve chilled, keeping the smooth chocolate surface simple.
Keep Homemade Chocolate Mousse Light and Airy
CHOCOLATE MOUSSE TEXTURE TIPS
Three Small Details for Fluffy Chocolate Mousse
🍫 Cool the melted chocolate. Hot chocolate can deflate the whipped cream. Let the mixture cool until lukewarm while keeping it fluid enough to fold.
🥣 Whip to medium peaks. The cream should hold its shape while remaining soft. Overwhipped cream can create a grainy mousse.
🤍 Fold gently. Use a spatula to lift the mixture from the bottom and turn it over. Stirring aggressively knocks out the air that makes mousse light.
Serving idea: Divide the mousse among small clear glasses before chilling. Individual portions look neat and make dessert easier to serve after Valentine’s dinner.
5. Sandwich Red Velvet Cookies with Cream Cheese Filling
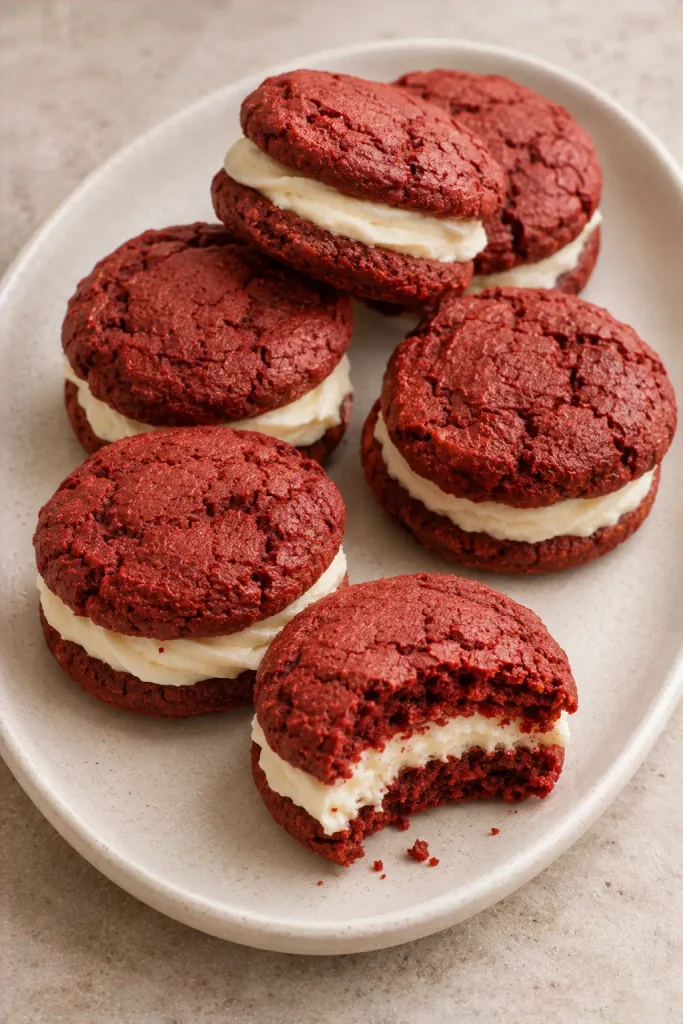
Red velvet cookie sandwiches have the look of decorated bakery treats without requiring piping or detailed icing work.
Heat the oven to 350°F (175°C).
Cream ½ cup softened butter with ¾ cup sugar. Beat in 1 egg, 1 teaspoon vanilla, and enough red gel food coloring for a deep red dough.
Mix in 1½ cups flour, 2 tablespoons cocoa powder, ½ teaspoon baking powder, and ¼ teaspoon salt.
Scoop 24 small cookies onto lined baking sheets. Bake for 9 to 11 minutes and cool completely.
For the filling, beat together:
- 4 ounces softened cream cheese
- 2 tablespoons softened butter
- ¾ cup powdered sugar
Sandwich a spoonful between two cooled cookies. Refrigerate until serving.
Three Details for Neat Red Velvet Cookie Sandwiches
RED VELVET COOKIE SANDWICH GUIDE
Soft Cookies, Creamy Filling, Clean Edges
A few small choices make the sandwich cookies easier to assemble.
A Simple Assembly Order
First: Match cookies of similar size.
Second: Spread filling on the flat side of one cookie.
Third: Add the matching cookie and press lightly until the filling reaches near the edges.
Storage tip: Keep filled cookies in a covered container in the refrigerator because of the cream cheese filling. Let them soften briefly before serving if you prefer a more tender cookie texture.
6. Roll No-Bake Chocolate Cookie Truffles with Pink Sprinkles
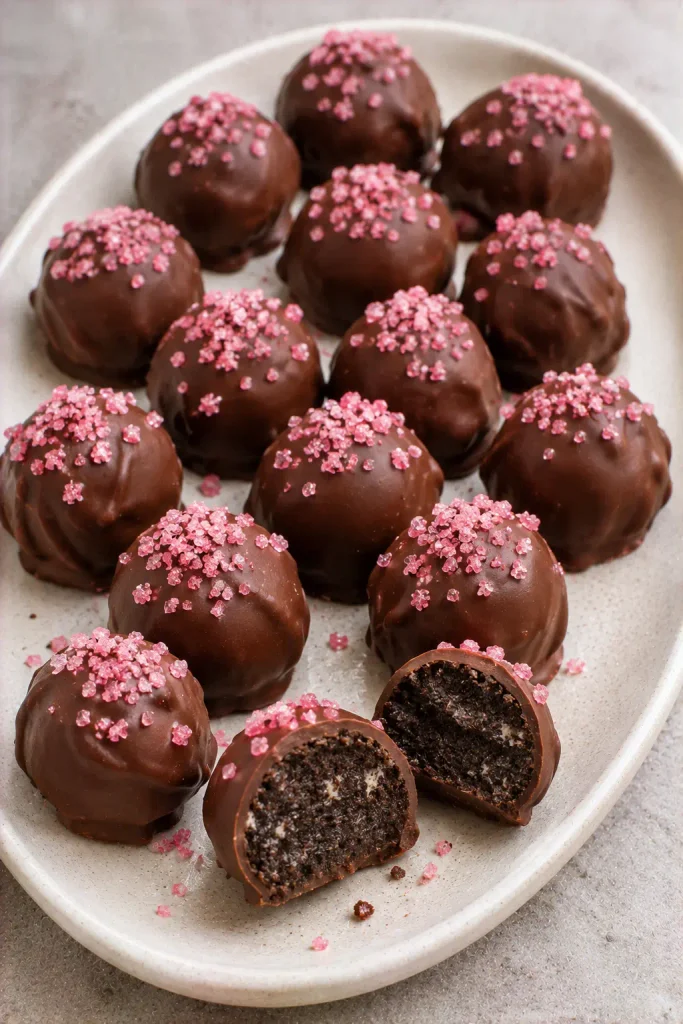
These little chocolate truffles look like fancy candy-shop treats, but there’s no baking involved.
Crush 24 chocolate sandwich cookies, including the cream filling, into fine crumbs. Mix with 4 ounces softened cream cheese until the mixture holds together.
Roll into about 20 small balls, then refrigerate for 30 minutes.
For the coating:
- Melt 10 ounces semisweet chocolate in short microwave intervals, stirring frequently.
- Dip each chilled truffle into the chocolate.
- Place on parchment paper and immediately add pink sugar sprinkles.
Refrigerate until the chocolate sets.
Keep the truffles chilled until serving. For a cleaner finish, remove any excess chocolate before placing them on the parchment.
Three Steps to Smooth Chocolate Cookie Truffles
NO-BAKE CHOCOLATE TRUFFLE GUIDE
Roll, Chill, and Dip Without the Mess
Make a Firm Cookie Mixture
Crush the sandwich cookies into fine crumbs before adding cream cheese. Large cookie pieces make the balls harder to roll smoothly.
Chill Before Dipping
Refrigerate the shaped balls until firm. Cold truffles are easier to coat without breaking apart in warm chocolate.
Decorate While Chocolate Is Soft
Add the pink sprinkles immediately after dipping each truffle. Once the coating hardens, the sprinkles will not stick as easily.
For an even coating: Lift each truffle with a fork and gently tap away extra melted chocolate. This helps prevent thick chocolate puddles underneath.
7. Bake Mini Strawberry Hand Pies with Heart Cutouts
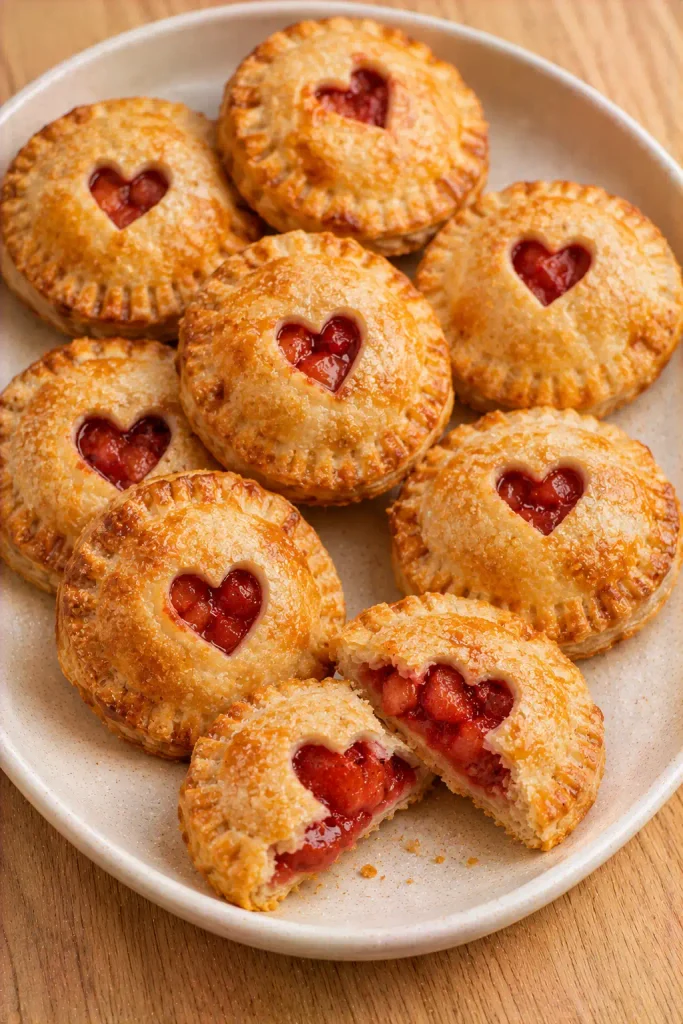
A little heart cutout turns an ordinary strawberry hand pie into a Valentine’s dessert.
Heat the oven to 400°F (205°C). Mix 1 cup finely diced strawberries, 2 tablespoons sugar, 1 tablespoon cornstarch, and 1 teaspoon lemon juice.
Unroll 2 refrigerated pie crusts. Cut about 16 circles using a 3-inch cutter, rerolling scraps as needed.
To assemble:
- Spoon a little filling onto eight pastry circles.
- Cut a tiny heart-shaped opening in each remaining circle.
- Cover the filling, press the edges, and crimp with a fork.
Brush with 1 beaten egg.
Bake for 18 to 22 minutes, until golden and the strawberry filling bubbles through the cutouts. Cool before serving.
How to Keep Strawberry Hand Pies from Leaking
STRAWBERRY HAND PIE GUIDE
Crisp Pastry with Strawberry Filling Inside
✓ DO THIS
Dice strawberries finely. Small pieces fit inside the pastry without pushing against the sealed edges.
Use cornstarch. It helps thicken the juices as the strawberry filling bakes.
Seal and vent. Press the edges firmly and leave a small heart opening for steam to escape.
✕ SKIP THIS
Overfilling the centers. Too many berries can force the pastry apart during baking.
Wet pastry edges. Strawberry juice on the sealing area can make it harder for the two crusts to stay closed.
Cutting a huge heart. An oversized opening can let most of the filling bubble out.
Before baking: If the assembled pies have become soft and sticky, chill them for 10 to 15 minutes. Cold dough is easier to transfer and helps the heart shapes stay defined.
8. Dress Up Fudgy Brownie Bites with Fresh Raspberries
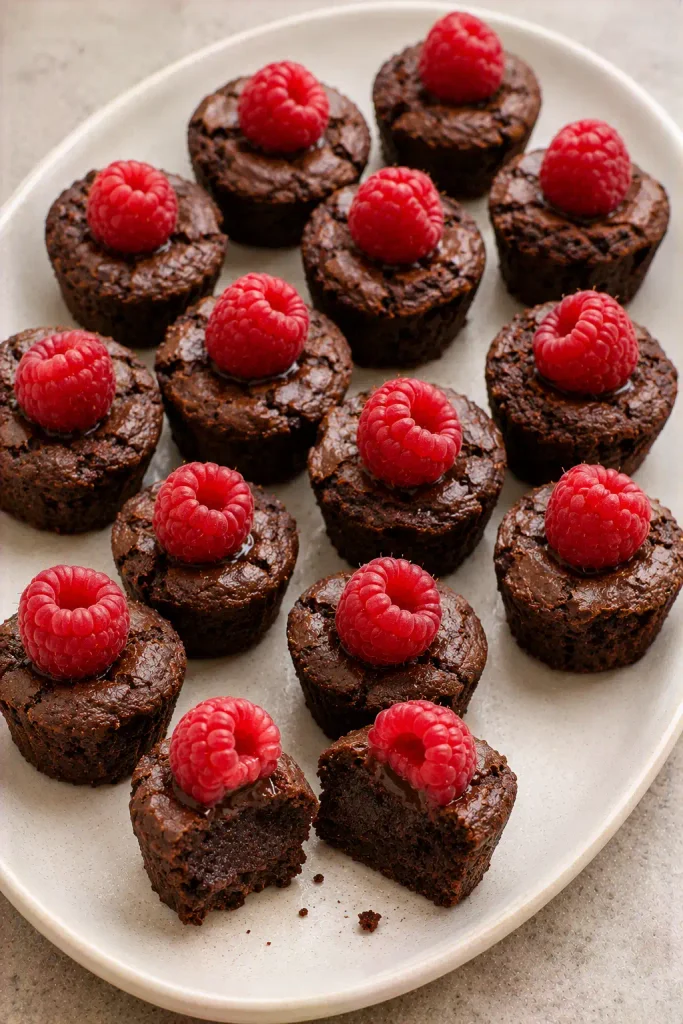
A single fresh raspberry makes a small chocolate brownie look like a dessert from a bakery display.
Heat the oven to 350°F (175°C) and grease a 24-cup mini muffin pan.
Whisk ½ cup melted butter, ¾ cup sugar, 2 eggs, and 1 teaspoon vanilla. Fold in ⅓ cup cocoa powder, ½ cup flour, and ¼ teaspoon salt.
Divide the batter among the muffin cups. Bake for 12 to 15 minutes, until the tops are set and a toothpick shows moist crumbs rather than raw batter.
Cool completely.
To decorate:
- Melt 2 tablespoons dark chocolate.
- Add a small dot of chocolate to each brownie.
- Gently place one fresh, dry raspberry on top.
Let the chocolate set before serving.
Two Easy Ways to Make Brownie Bites Look Special
BROWNIE BITE DECORATING GUIDE
Choose a Clean Finish or a Richer Chocolate Look
| Chocolate Dot and Raspberry | Thin Chocolate Drizzle and Raspberry |
|---|---|
| Use a tiny dot of melted dark chocolate to secure one raspberry to the brownie. | Drizzle a little melted chocolate across the brownie, then add the raspberry while the chocolate is soft. |
| The brownie stays simple, and the bright red raspberry becomes the main detail. | Thin chocolate lines give the dessert a slightly more decorated appearance. |
| Best when you want quick, neat decorations across many brownie bites. | Useful when you have extra melted chocolate and want a little more detail. |
Fresh raspberry tip: Choose firm berries and pat away surface moisture. Soft, wet raspberries can release juice onto the chocolate and brownie tops.
9. Build Strawberry Shortcake Cups with Fresh Whipped Cream
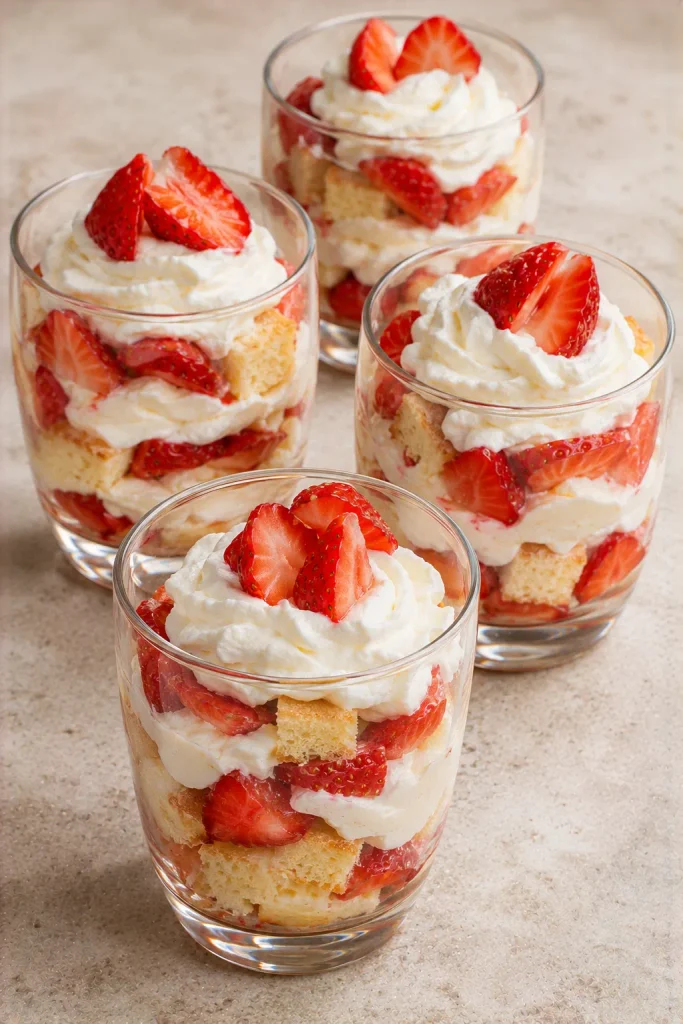
Strawberry shortcake cups look pretty through clear glass, and you don’t need to bake a whole cake.
Toss 2 cups sliced fresh strawberries with 1 tablespoon sugar. Let them sit for 10 minutes to release a little juice.
Cut 2 cups prepared vanilla pound cake into small cubes.
For the cream, whip 1 cup cold heavy cream, 2 tablespoons powdered sugar, and ½ teaspoon vanilla until soft to medium peaks form.
Divide the ingredients among six small glasses:
- Add a layer of pound cake cubes.
- Spoon strawberries and a little juice over the cake.
- Add whipped cream and repeat the layers.
Finish with a few strawberry slices.
Refrigerate until serving, preferably assembling close to dessert time so the cake doesn’t become too soft.
The Three Layers of Strawberry Shortcake Cups
STRAWBERRY SHORTCAKE CUP GUIDE
Build Pretty Dessert Cups Without Soggy Cake
The trick is balancing the cake, berry juice, and whipped cream.
🍰
Layer 1: Cake
Cut pound cake into small, even cubes. A loose layer gives the berries somewhere to settle without packing the cake tightly.
🍓
Layer 2: Berries
Use strawberries with a little natural juice. Too much liquid can turn the cake mushy before serving.
🤍
Layer 3: Cream
Add a soft layer of whipped cream. Leave a little space at the top for fresh strawberry slices.
For Clean Glass Layers
Use a small spoon: Add strawberries carefully so their juice does not run down every side of the glass.
Pipe the cream: A piping bag or zip-top bag helps place whipped cream neatly around the edges.
Finish last: Add the top strawberry slices close to serving so they look fresh.
10. Break Pink and White Chocolate Pretzel Bark into Pieces

Sweet chocolate and salty pretzels make an easy Valentine’s treat that doesn’t need an oven.
Line a small baking sheet with parchment paper.
Melt 10 ounces white chocolate gently in the microwave, stirring every 20 seconds. Separately melt 5 ounces pink candy melts according to the package directions.
Spread the white chocolate into a rectangle about ¼ inch thick.
To finish:
- Spoon small ribbons of melted pink candy coating over the white chocolate.
- Swirl gently with a toothpick.
- Sprinkle 1½ cups lightly broken mini pretzels across the top.
Let set in a cool place, or refrigerate briefly until firm.
Break into irregular pieces and store in an airtight container in a cool, dry place.
Pink and White Chocolate Pretzel Bark Checklist
VALENTINE’S PRETZEL BARK CHECKLIST
Make Clean Swirls and Crunchy Chocolate Bark
Keep everything dry. Water can cause melted chocolate to seize. Dry bowls, spoons, and pretzels are important.
Melt the colors separately. White chocolate and pink melting wafers may soften at different rates. Gentle heating helps keep both smooth.
Swirl only a few times. Too much mixing blends the pink and white into one color instead of leaving pretty marbled lines.
Press pretzels gently. Add them while the coating is soft so they stay attached when the bark hardens.
Color tip: Use ready-made pink candy melts instead of ordinary water-based food coloring. Water-based coloring can make melted white chocolate clump.
11. Bake Raspberry Lemon Bars with a Powdered Sugar Finish
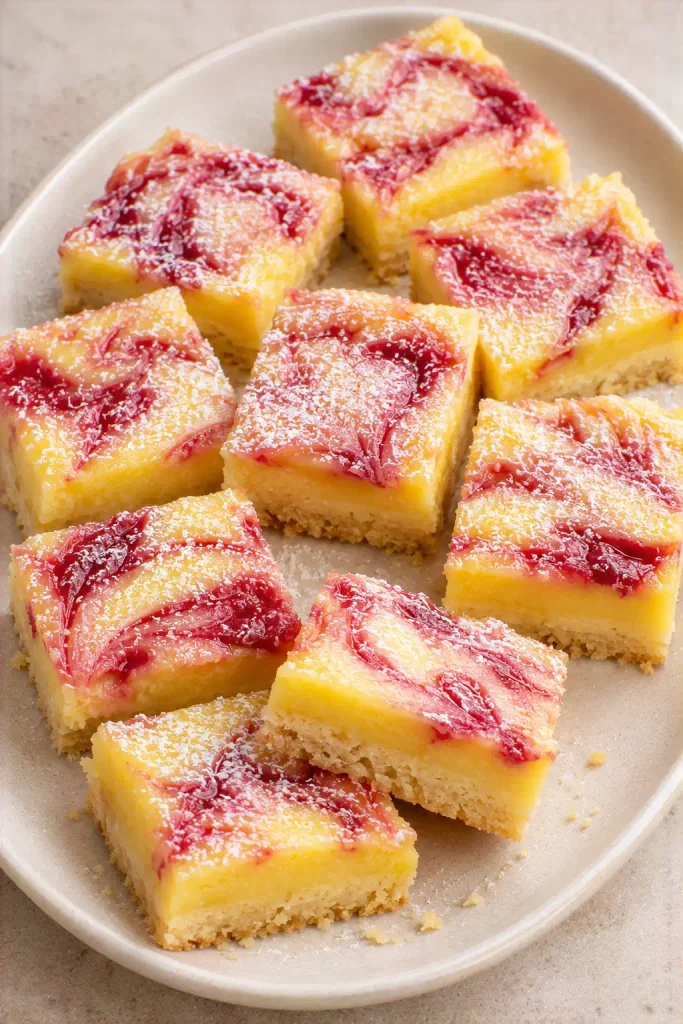
These bars have pretty pink raspberry swirls without needing frosting or complicated decorations.
Heat the oven to 350°F (175°C). Line an 8-inch square baking pan with parchment paper.
Mix 1 cup flour, ¼ cup powdered sugar, and ½ cup softened butter into a crumbly dough. Press into the pan and bake for 18 to 20 minutes.
Whisk together:
- 2 eggs
- ¾ cup sugar
- ⅓ cup fresh lemon juice
- 2 tablespoons flour
- 1 teaspoon lemon zest
Pour over the warm crust. Add small spoonfuls of ¼ cup seedless raspberry jam and swirl gently.
Bake for another 18 to 23 minutes, until the center is set. Cool, refrigerate for at least 2 hours, then cut into squares.
Dust with powdered sugar just before serving.
From Shortbread Crust to Raspberry Lemon Bars
RASPBERRY LEMON BAR BAKING GUIDE
Three Layers of a Pretty Lemon Bar
🧈
BEFORE: Build the Layers
Shortbread base: Press the dough evenly into the pan so the bars have a sturdy bottom.
Lemon filling: Whisk until smooth and pour onto the warm baked crust.
Raspberry swirl: Add small jam dots and drag a toothpick gently through them.
🍋
AFTER: Chill and Slice
Firm filling: The lemon layer should be set, with no runny center.
Visible pink swirls: Raspberry patterns should remain delicate rather than blending into the lemon filling.
Clean squares: Chilling helps the bars hold their shape when cut.
For neat slices: Lift the chilled bars out using the parchment overhang. Cut with a sharp knife, wiping the blade between cuts. Add powdered sugar after slicing so the raspberry swirls remain visible.
12. Shape Cinnamon Sugar Puff Pastry Palmiers into Hearts
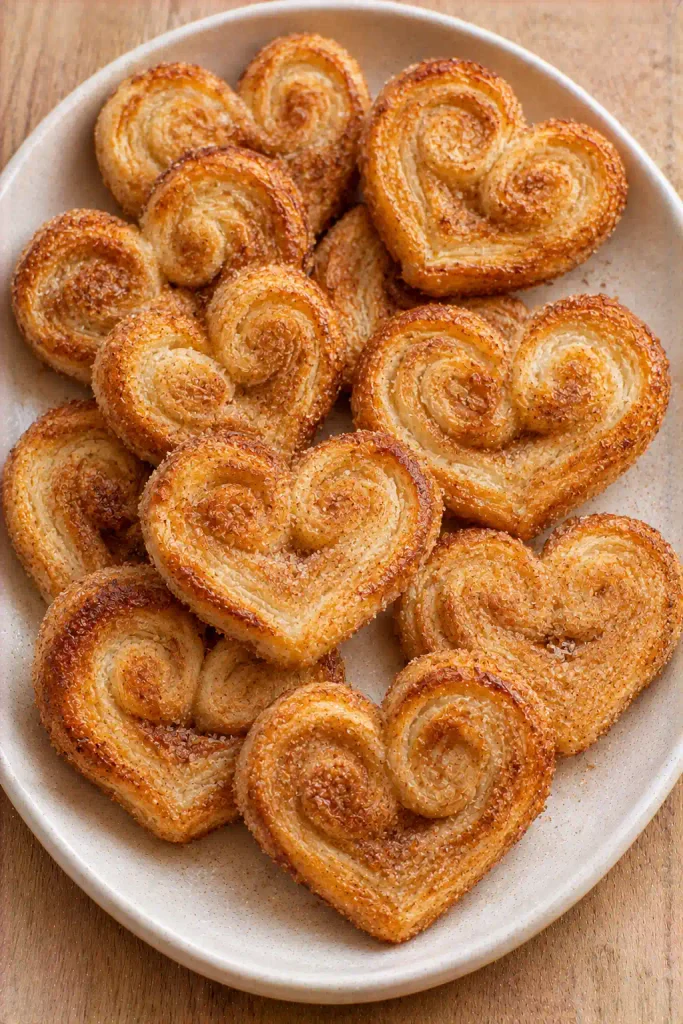
Heart-shaped palmiers use the natural folds of puff pastry, so you don’t need a cookie cutter.
Heat the oven to 400°F (205°C). Mix ⅓ cup granulated sugar with 1 teaspoon ground cinnamon.
Sprinkle some cinnamon sugar on your work surface. Place 1 thawed puff pastry sheet on top, then sprinkle with the remaining sugar.
Gently roll the dough to press in the sugar.
To shape the hearts:
- Fold both long edges toward the center.
- Fold the sides inward again so they meet.
- Fold one half over the other and chill for 20 minutes.
Slice into ½-inch pieces and arrange cut-side up, leaving room to spread.
Bake for 16 to 20 minutes, turning halfway, until puffed and golden brown.
Three Steps to Heart-Shaped Puff Pastry Palmiers
HEART-SHAPED PALMIER GUIDE
Fold, Slice, and Bake Golden Pastry Hearts
Fold Toward the Center
Bring the two long sides inward evenly, repeating the fold before closing the dough like a book. This creates the paired spiral shape.
Chill and Cut
Refrigerate the folded pastry until firm. Cut even slices with a sharp knife, and gently open the top of each slice to form a heart.
Bake Until Caramelized
Leave space between the palmiers. Turn them carefully during baking so the cinnamon sugar develops golden, crisp surfaces on both sides.
Cooling tip: Let the palmiers cool on parchment before moving them. The melted sugar is very hot, and the pastry becomes crisp as it cools.
13. Make No-Bake Chocolate Peanut Butter Cups in Mini Liners
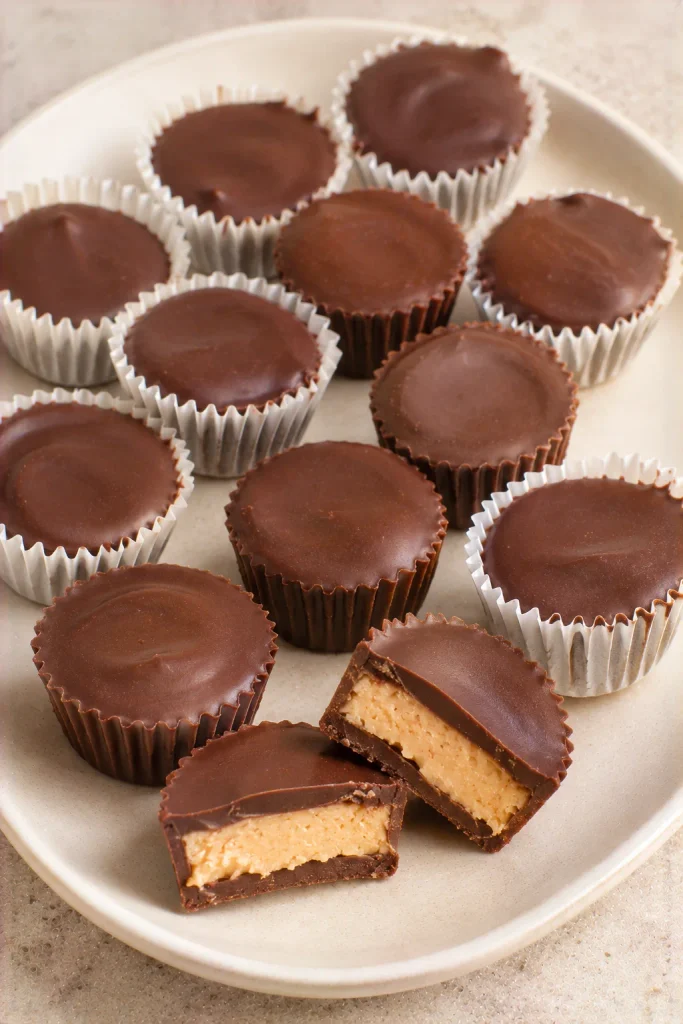
Homemade peanut butter cups look impressive when the chocolate layers are neat, but they’re surprisingly simple.
Line a mini muffin pan with 18 paper candy liners.
Melt 10 ounces semisweet chocolate gently, stirring until smooth. Spoon a little into each liner, spreading it across the bottom. Refrigerate for 10 minutes.
Meanwhile, mix:
- ⅓ cup creamy peanut butter
- 2 tablespoons powdered sugar
- 1 tablespoon softened butter
Place a small spoonful of filling in each cup, leaving space around the edges.
Cover with the remaining melted chocolate and gently smooth the tops.
Refrigerate for 20 to 30 minutes, until firm. Peel away the liners before serving, or leave them on for easy handling.
How to Make Neat Chocolate Peanut Butter Cups
HOMEMADE PEANUT BUTTER CUP GUIDE
Keep the Peanut Butter Inside the Chocolate
✓ DO THIS
Set the bottom chocolate. A short chill makes a firm base before you add the filling.
Keep filling in the center. Leave a little space around the peanut butter for the chocolate to seal the sides.
Cover the filling fully. Spread the final chocolate layer to the paper liner edges.
✕ SKIP THIS
Overfilling the liners. Too much peanut butter leaves little room for the top chocolate layer.
Overheating the chocolate. High heat can make chocolate thick, scorched, or difficult to spread.
Peeling liners too early. Let the cups set fully before removing their wrappers.
Storage and serving: Keep the cups in a covered container in the refrigerator, especially in a warm room. Label them clearly if serving guests, since they contain peanuts.
14. Bake Raspberry Swirl Mini Cheesecakes in a Muffin Tin
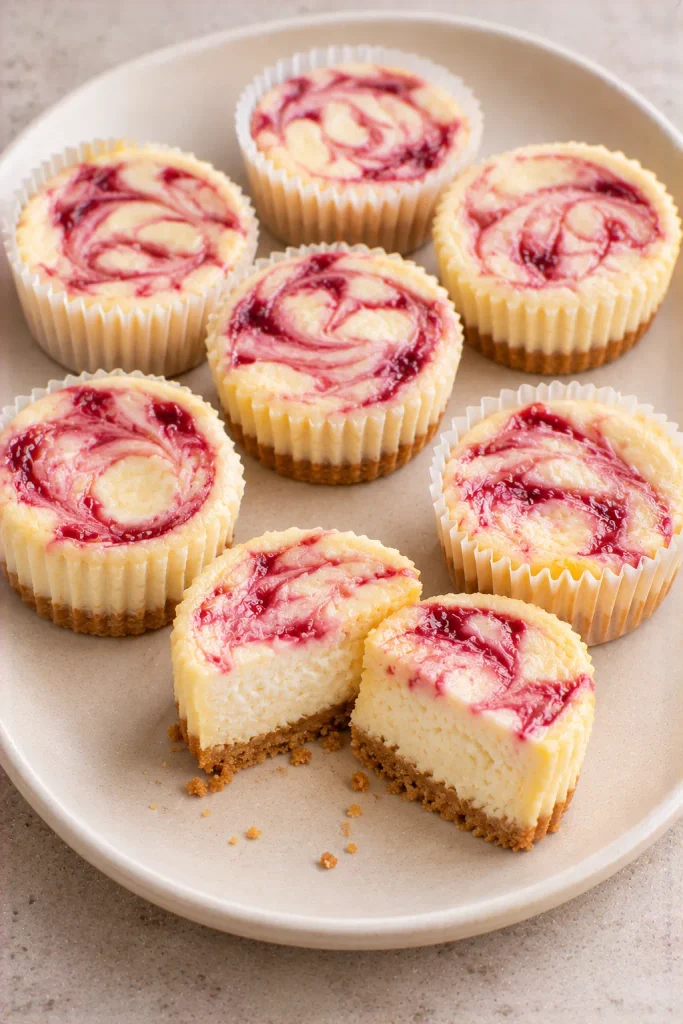
Mini cheesecakes are easier to serve than a large cheesecake, and a little raspberry jam gives each one a pretty finish.
Heat the oven to 325°F (165°C). Line a 12-cup muffin tin with paper liners.
Mix 1 cup graham cracker crumbs with 3 tablespoons melted butter. Press into the liners and bake for 5 minutes.
Beat 16 ounces softened cream cheese with ½ cup sugar. Mix in 2 eggs, one at a time, and 1 teaspoon vanilla.
Divide the filling among the liners. Add small dots of 2 tablespoons seedless raspberry jam, divided between the cheesecakes, and swirl with a toothpick.
Bake for 18 to 22 minutes, until the edges are set and centers wobble slightly.
Cool, then refrigerate for at least 4 hours before serving.
Keep Raspberry Swirl Mini Cheesecakes Smooth
MINI RASPBERRY CHEESECAKE TIPS
Get Smooth Filling and Pretty Pink Swirls
🧀 Start with softened cream cheese. Cold cream cheese can leave lumps in the batter. Softened cream cheese mixes more evenly with the sugar.
🥚 Mix eggs gently. After adding the eggs, use low speed and mix only until combined. Too much air can encourage the cheesecakes to puff and crack.
💗 Make small raspberry swirls. Add a few tiny dots of seedless jam and drag a toothpick through them once or twice. Too much swirling can turn the top uniformly pink.
⏱️ Cool before chilling. Let the cheesecakes cool gradually after baking. Refrigerate until properly chilled before peeling away the liners.
Doneness check: The outer edges should look set, while the middle can still have a small gentle wobble. The centers firm up as the cheesecakes cool and chill.
15. Cut Heart-Shaped Rice Cereal Treats with Pink Chocolate Drizzle
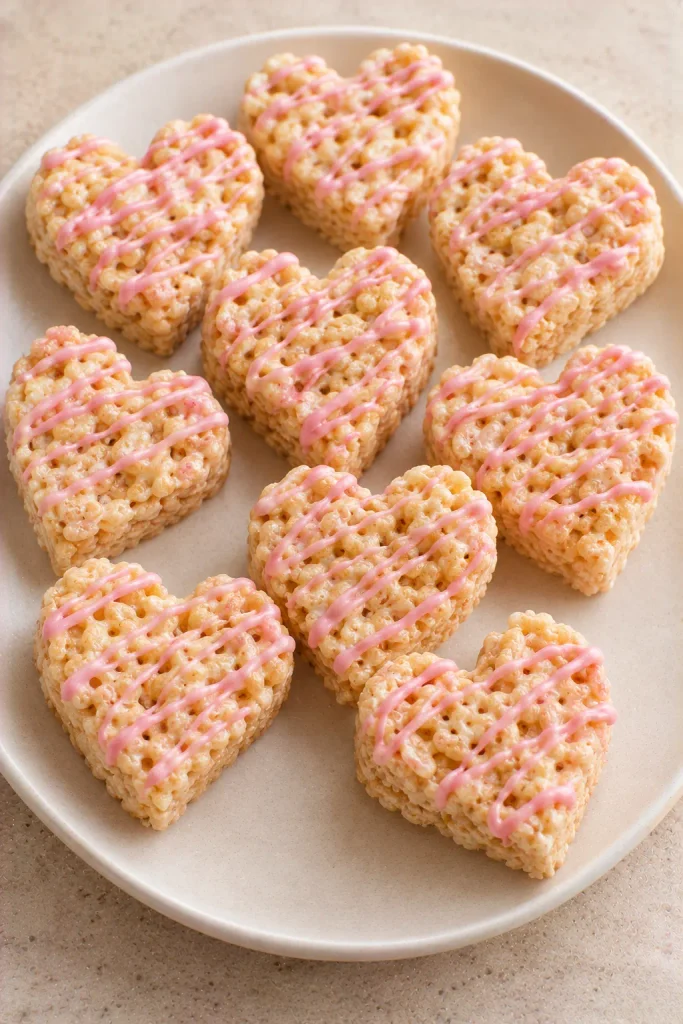
These heart-shaped treats are a simple choice when you want something festive without turning on the oven.
Line a 9-by-13-inch pan with parchment paper.
Melt 3 tablespoons butter in a large saucepan over low heat. Add 10 ounces mini marshmallows, stirring until smooth.
Remove from the heat and quickly fold in 6 cups crispy rice cereal.
Press the mixture gently into the prepared pan. Let cool until firm enough to cut, about 30 to 45 minutes.
For the finishing touch:
- Cut hearts using a medium heart-shaped cookie cutter.
- Melt 4 ounces pink candy melts according to the package directions.
- Drizzle thin pink lines across the hearts.
Let the coating set before serving.
Three Details for Pretty Rice Cereal Hearts
HEART-SHAPED CEREAL TREAT GUIDE
Soft Centers, Clean Hearts, Delicate Pink Drizzles
These three details make the treats easier to shape and decorate.
Two Little Finishing Tricks
For easier cutting: Lightly grease the heart-shaped cutter so the sticky cereal mixture releases more easily.
For leftover pieces: Press the scraps together gently and cut smaller hearts, or save them as bite-sized snacks.
16. Fill Mini Tart Shells with Vanilla Cream and Fresh Berries
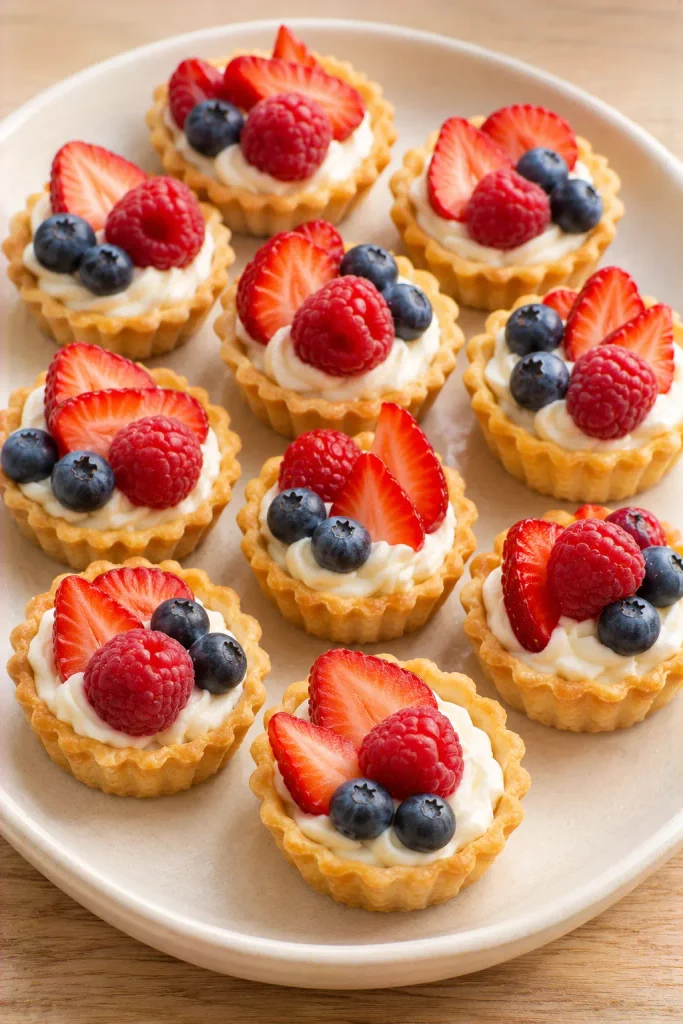
Mini fruit tarts look like bakery desserts, but using ready-made tart shells keeps the preparation simple.
Beat 4 ounces softened cream cheese, ¼ cup powdered sugar, and ½ teaspoon vanilla extract until smooth.
In a separate bowl, whip ½ cup cold heavy cream to medium peaks, then gently fold it into the cream cheese mixture.
To assemble:
- Arrange 12 fully baked mini tart shells on a tray.
- Spoon or pipe the vanilla cream into each shell.
- Top with 1 cup fresh mixed berries, washed and completely dried.
Refrigerate until serving.
For crisp pastry, prepare the cream ahead of time but fill the shells shortly before serving. A small strawberry slice beside a raspberry makes each tart look colorful without extra decorating.
What to Prepare Ahead and What to Finish on Valentine’s Day
MINI BERRY TART PREPARATION GUIDE
Plan Ahead Without Losing the Crispy Tart Shell
Keeping the pastry, filling, and berries separate until assembly helps the finished tarts look fresh.
| Prepare Ahead | Finish Before Serving |
|---|---|
| Keep fully baked, unfilled tart shells in a covered container according to their package storage instructions. | Arrange the shells on a serving platter and check that they remain crisp. |
| Prepare the vanilla cream filling and store it covered in the refrigerator for up to one day. | Gently stir the filling if needed, then pipe or spoon it into the tart shells. |
| Choose firm, fresh berries. Refrigerate them separately from the cream and shells. | Wash and thoroughly dry the berries, then arrange them over the cream shortly before serving. |
Three Details for Neat Mini Tarts
Use a piping bag. It helps fill small pastry shells without smearing cream along the edges.
Keep berries dry. Extra moisture can run into the cream and soften the pastry.
Vary the fruit slightly. Mix whole raspberries, small blueberries, and strawberry slices for natural color variation.
Serving tip: Assemble the tartlets close to dessert time. Keep the filled tarts chilled until serving, since the vanilla cream contains dairy.
17. Bake Soft Heart-Shaped Sugar Cookies with Simple Pink Icing
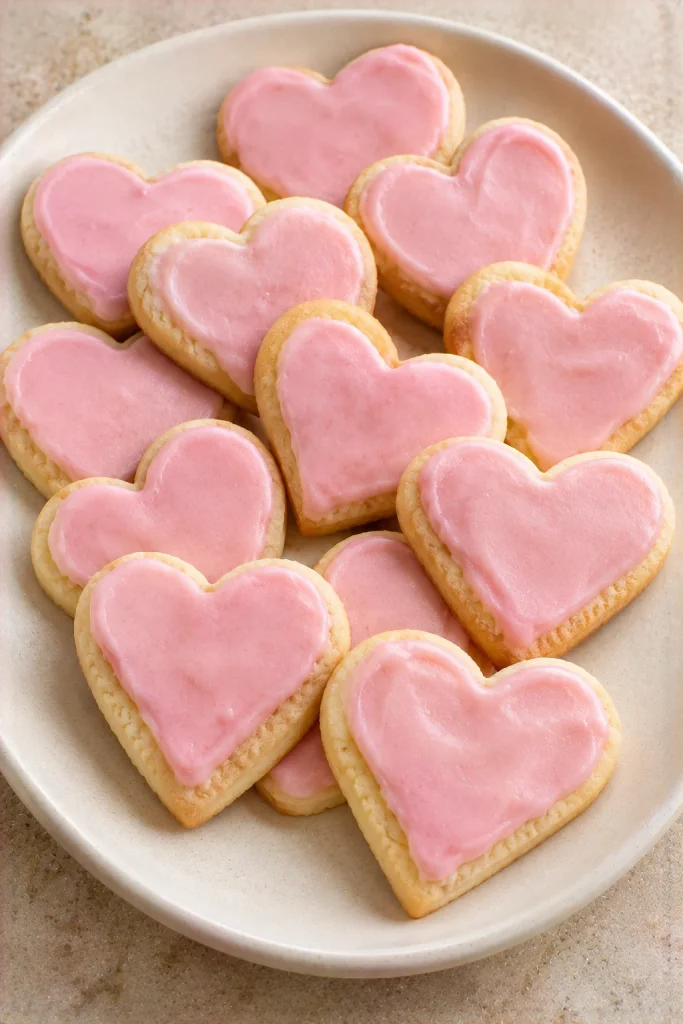
You don’t need complicated piping techniques to make pretty Valentine’s sugar cookies. A simple pink icing gives each heart a homemade finish.
Heat the oven to 350°F (175°C).
Beat ½ cup softened butter with ¾ cup sugar. Mix in 1 egg and 1 teaspoon vanilla.
Add 1¾ cups flour, ½ teaspoon baking powder, and ¼ teaspoon salt.
Chill the dough for 30 minutes. Roll to ¼-inch thickness, cut into hearts, and bake for 8 to 11 minutes, until the edges are set.
Cool completely.
For the icing:
- Mix 1 cup powdered sugar with 1½ to 2 tablespoons milk.
- Add a small amount of pink food coloring.
- Spread or pipe over the cookies.
Let the icing set before stacking.
Three Details for Beautiful Heart-Shaped Sugar Cookies
VALENTINE’S SUGAR COOKIE GUIDE
Soft Cookies with Neat Pink Icing
The dough temperature, cookie thickness, and icing consistency all affect the finished hearts.
💗
Heart Shape
Chilled Dough
Cold dough is easier to cut cleanly. If the hearts become soft before baking, chill the cut cookies briefly on the tray.
🍪
Cookie Texture
Even Thickness
Roll the dough evenly so the hearts bake at a similar rate. Remove them when the edges are set, before they become deeply browned.
🎨
Pink Icing
Slowly Spreading
Add milk a little at a time. The icing should spread smoothly without immediately running off the cookie edges.
Quick Icing Consistency Check
Too Thick?
Add a few drops of milk and stir. The icing should loosen gradually without becoming watery.
Too Runny?
Mix in a little more powdered sugar until the icing holds its shape better.
Decorating shortcut: Spread the icing with the back of a small spoon, leaving a thin border of cookie visible. This looks neat without needing piping bags or special decorating tools.
Make Valentine’s Day a Little Sweeter
A beautiful Valentine’s dessert doesn’t need a long ingredient list or fancy decorating tools. Chocolate-covered strawberries and cookie truffles are easy to prepare without an oven, while raspberry pastry hearts and mini cheesecakes add a bakery-style touch with simple steps.
These valentine’s day desserts give you plenty of choices for different celebrations. Make cheesecake jars ahead for a quiet dinner, bake heart-shaped sugar cookies to share, or prepare little berry tarts for a Valentine’s party.
Choose a dessert that fits your time, keep the decorations simple, and let the chocolate, berries, and pretty colors do most of the work.
Save these 17 Valentine’s Day desserts to your Pinterest Valentine’s Day Recipes or Easy Dessert Ideas board so you can come back to the recipes whenever you want to make something sweet and special.